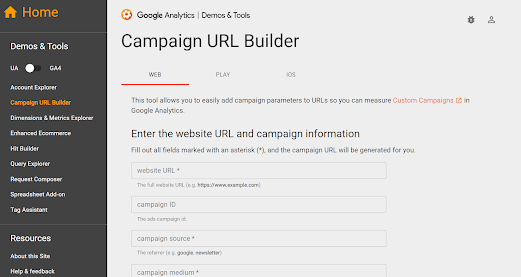
All you have to do to track campaigns automatically is use Google’s campaign URL builder ( https://ga-dev-tools.web.app/campaign-url-builder/ ) to create a trackable URL. While you can also add UTM parameters manually to any link, this tool makes it really easy to build your URLs with all the relevant information. All you have to do is enter the URL you want to track, along with the parameters to track it by.
Once you fill out your campaign details, Google will give you your trackable URL.
Once you have the URL, you can copy it and use it to begin tracking a marketing campaign.
Since the reports for the links are your own and only really need to make sense to you and your marketing teams, there’s technically no wrong way to label your tracked URLs.
However, there are a few suggestions to keep your reports cleaner and your attribution data easier to parse for insights:
- Consider a standard naming convention upfront. Because each URL will have multiple parameters, things can get messy and difficult to read later, unless you adopt a similar style upfront for naming everything.
- Keep in mind that anyone clicking on the link will be able to see the parameter’s label, so don't write anything you wouldn’t want your customers or your competitors to see.
- Parameters are case-sensitive. If you want to keep it simple, just default to lowercase letters and avoid spaces or dashes.
- Because these tracked URLs tend to be long, if you’re displaying them publicly, like in ad copy or a social media bio, you can consider using a link shortener service like bit.ly to make them shorter.
- Only create parameters that are necessary.Redundant parameters only serve to split your traffic unnecessarily.
- Utm_source and utm_medium must always be used together. If you’re missing either one, the traffic won’t show in your reports.
- Without UTM parameters, the traffic from a link may still be assigned a default source and medium, or it may get attributed as general direct traffic.


